5 Top Hacks When Laying Patio Pavers in your Yard

Are you considering laying a patio yourself but afraid of getting it wrong? Do you think you have what it takes to transform a tired yard into something spectacular? While laying patio pavers may be physically demanding and time-consuming, it is a task that most homeowners are able to tackle without if willing to put in the effort.
All you need to know are a few handy hints to get you started. To help, we have provided our five need-to-know hacks for laying patio pavers.
1. Outline the Area
The first step is to choose an area in which you will construct the patio. From easy squares to complex circles, string and stakes will always prevail. Use the stakes to show the corners and curves of the intended patio, then run string between them so you can visualize the edges as you work.
Next, you need to thoroughly clear the area within the string and stakes. Remove any shrubs, weeds, stumps, or rocks from the site your patio will sit on. You will then need to dig down around 6 inches to make way for the base and pavers.
Using a level and rake, make sure the ground is level, or at the gradient you desire. Compact the soil to create a firm bed.
2. Set the Foundation
Now you have cleared the ratio area and outlined the place the patio will go, you need to begin laying the foundations. This is a crucial part of the process that you must not skip. It will mean that your pavers will stay in place when walked upon and during adverse weather conditions.
Purchase a roll of landscape fabric. Lay it carefully over the patio bed. Cut the edge so the fabric fits in place. Landscape fabric is an amazing dual-purpose product. It will let water through, allowing for drainage on your patio. Secondly, it prevents weeds from growing through the patio and rearing their unsightly head between the joints.
Once you have completed this, lay a foundation of gravel over the fabric. Choose crushed rock gravel, as it will not be noticeable once the pavers go on top. Ideally, you want a 2-inch layer of crushed gravel, laid evenly, and leveled with a rake.
3. Level and Sand
Now you need to level off the surface and add a layer of sand for extra sturdiness. Tamp the gravel using a compactor so it is firm and does not shift underfoot. Once complete, add another 2 inches of gravel and compact once more.
You must now check that the whole compacted area is level, before adding more sand and the pavers. Attach your level to a board that you know has a straight edge. Check how level the surface is by moving the board across the bed, attempting to get as even a surface as possible.
The next two stages are optional, but will really hold your pavers in place and make them last longer. Firstly, add a final layer of sand for support. It should be around two inches worth and leveled as you did with the gravel.
Edge restraints are the next option and should be added at this point. They are made of aluminum, plastic, or steel and are placed at the edge of the compaction. They are secured into the ground using small spikes.
4. Laying Patio Pavers
Now you have done creating a foundation, you can begin preparing the pavers before they are laid. Start by washing any dust and dirt from them using a hose.
If you want a more intricate look, you may consider having a mix and match of different sizes and colors. This can be done using a compact brick cutter, and by slicing some stones in half you can even reduce your costs. If you rent a cutter, the person who owns the machinery may even offer to cut them for you.
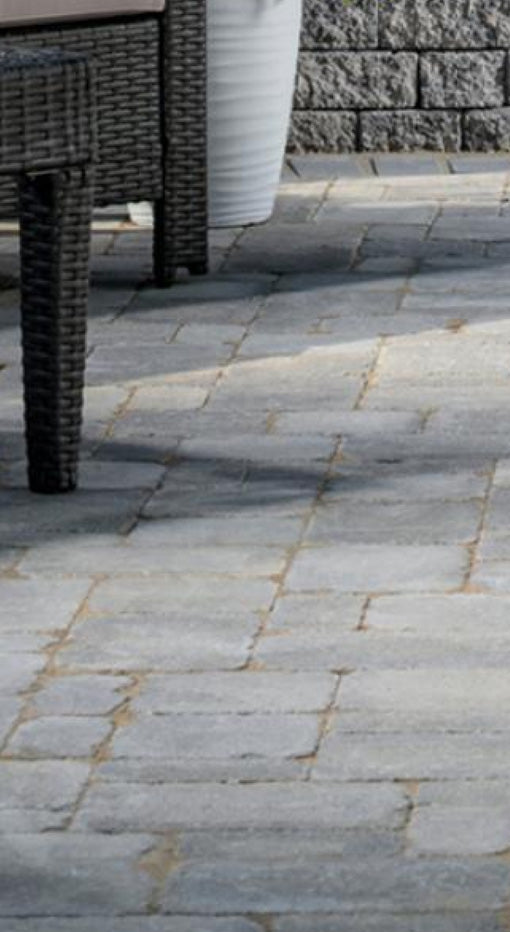
Start by laying the pavers from any 90-degree corners, working outwards in straight lines. Make sure pavers are dropped vertically into place, as sliding or dragging them will result in uneven surfaces in the sand layer. Pavers should have a gap between them between 1.6 cm to 3.2 cm depending on the size.
Straight lines should be checked using a string and check your pavers are flat using the level. If you have curved edges, lay the whole pavers first, then go back and shape using the contour of a string as a guide.
5. Seal the Pavers
Once the pavers are down and in place, you still have a little more work to do. With some additional effort, you can seal the blocks so that they will last longer and maintain their tidy appearance.
The first step is to compact the pavers themself. Use a plated compactor, and firmly stamp the pavers into the sand below. Go over them twice to ensure they are sturdy and in place.
You should always place a barrier of carpet or rubber between the compactor and paving stone. This ensures you do not damage the pavers.
Once this is complete, spread a thin layer of sand over all of the pavers. Using a brush, fill the sand into the cracks between the stones. Filling in the joints in this way will lock the pavers in place and prevent them from moving around.
Then, hose the pavers down and leave them to dry. Once dried, we recommend that you seal them with an appropriate sealing product. This will add durability and take up less maintenance time in the future.
Decorate With Garden Furniture
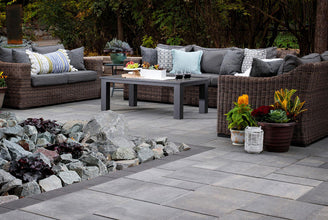
Once you have dealt with laying patio pavers, you can enjoy your new slice of utopia! Decorate it with garden and outdoor furniture, making sure to choose chairs that have legs that do not fall between the cracks. Try to avoid putting any heat sources on the patio, like firepits or chimneys, to ensure it lasts even longer.
If you are looking to liven up your outdoor space, shop our curated selection of pavers today. Contact us with any questions you might have. Our team would be happy to advise you on what pavers would be best for your project.

Questions?
Give us a call!
With over 25 years’ experience designing and installing hardscapes in the field, our team has the expertise to address nearly any hardscape question you might have.


Saluting Our Heroes
We’re grateful to the men and women of our armed forces who put their lives on the line to protect our freedom. That’s why we donate a percentage of every sale we make to the Wounded Warriors Project.


